Despite what many people think, there’s nothing wrong with using throw pillows to help bring personality, color, and texture to any room! Learning how to make a throw pillow cover is a fun and easiest sewing project if you want to add a little fresh decor. With this guide, we’ll navigate you every step of the way, from choosing the right materials to sewing methods and maintenance tips for how to make throw pillow covers.
Why Make Your Own Pillow Covers?
Creating your own throw pillow covers offers several benefits:

- Customization: Once you choose a design for a pillowcase you can display the fabric, color, or pattern on your wall that best suits your style. This means you can simply have seasonal new pillows covered or match the covers with the theme.
- Cost-Effective: Custom-made envelope pillow covers can be cheaper than the ones you buy. Unique designs tend to be costly, and they can be added to store-bought covers.
- Creative Outlet: Sewing can be attractive as a pastime and an important hobby that allows you to exhibit your imagination and teach you methods to create the best pillow form. It allows you to try different styles, couching patterns, and techniques with new fabric.
- Quality Control: Choosing high-quality materials is unlikely to be found in store-bought options. It means that our pillow covers won’t tear easily.
- Sustainability: By using eco-friendly materials you’re also furthering your steps towards a more sustainable lifestyle and making your own covers.
Materials Needed
Before diving into the process, gather the following materials:

1. Fabric
Pick the fabric of your choice that best fits your style. Durability and ease of cleaning are great with cotton, linen, or canvas. Seasonal new fabrics are as volatile as flannel for winter and lightweight cotton for your living room in the summer. You can buy it from any website.
2. Pillow Insert
Choose a pillow insert of size that complements the control. Probably they are square pillows like 16×16 inches, 18 x 18 pillow and 20×20 inches. Additionally, you can pick up inserts made of memory foam for extra comfort. You can also buy it from any website or locally.
3. Sewing Machine
If sewn by hand, it takes time, but you can sew it.
4. Thread
Find a shaft that goes with your material. It should be strong enough to be regularly used for home decor.
5. Scissors
Clean cuts require the use of fabric scissors. A rotary cutter can also be used for straight outer edges. You can buy best scissors from few trusted website like Amazon and Wallmart etc.
6. Measuring Tape
For a perfect fit, it’s important for the measurements to be accurate and to avoid wrong paper patterns. That can get tricky without a quilting ruler. Many of website sell it you can buy it from them
7. Pins
To join fabric pieces whilst sewing. If you don’t want to use pins, there are fabric clips that you can use instead.
8. Iron
To press seams and smooth the finishing. A steam iron may help get rid of stubborn wrinkles. If you want to buy a good iron then gor from trusted website like Amazon and Ebay etc.
9. Sewing Pattern (Optional)
You can use a basic paper pattern if you are a newbie. You can follow plenty of free how-to patterns online for long edges and raw edges.
Step-by-Step Guide to Making
Making a pillow is as simple as a 30 minutes few steps. Here are a few steps to make your pillow cover easy.

Measure Your Pillow Insert
Measure the pillow insert by start. Use the exact dimensions to fit looser take 1 inch off the width and the height. If your insert is 18×18 inches, for example, cut two pieces of paper that are 19×19 inches, so half inch seam allowances overlap a bit at the seam.
Cut Your Fabric
Cut two squares in straight lines (or rectangles if your pillow is not square) from your fabric using your measurements. Be careful to cut in straight edges.
Prepare the Fabric
Before sewing wash and iron the fabric so you don’t have to live with a shrunken garment. Also, whether you are ironing or not, it will help smooth any wrinkles and give you a neat finish. It’s very important to prewash cotton and linen.
Pin the Fabric
Put the two fabric pieces right sides together. In other words, the sides you want to show when the pillow is finished will be on facing sides. Secure the edges with pin so the fabric is lined up as you should.
Sew the Edges
Sew around the edges of the fabric using your sewing machine, then leave around a ½ inch or 1 seam allowance. Be sure to leave one side open (about 6-8 inches) to insert the pillow. To add strength you can use a straight stitch or a zigzag stitch according to your pillow size.

Trim the Corners
When you trim the excess fabric at the corners you create crisp corners. Watch out for fraying, as you should not cut too close to the seam.
Turn the Cover Right Side Out
Turn the cover right side out through the opening you left and turn carefully. With a pencil or a chopstick, gently push out the corners so they are sharp and defined in the four corners.
Insert the Pillow
Lay your pillow insert inside the cover. Make certain that it fits snugly and you can adjust the corners. Make sure the pillow is fluffed evenly to distribute better filling.
Close the Opening
You can close the opening by hand stitching or with your sewing machine. For hand sewing stitch a slip stitch to get a neat look. It is almost invisible and a professional-looking stitch.
Final Touches
Shake your pillow up and fluff it. You can also flatten the finished cover to get rid of any wrinkles. Once that’s done enjoy your handiwork by putting your new throw pillow on your chair or bed etc.
Variations Of Throw Pillow Covers
Once you’ve mastered the basic technique then consider experimenting with different styles and closures:

Zippered Pillow Covers
However, by adding a zipper we can easily remove and clean. To create a zippered cover:
Make an opening in one side of your fabric pieces where you will put your zipper and cut it.
Mark the pieces of upholstery before the zipper attachment and sew them together according to the manufacturer’s instructions that are mentioned their website to make the invisible zipper.
Button Closure
A button closure adds a decorative touch:
Find where the fabric is thick at the screw. Measure and sew button holes into one side of the fabric and on the other side sew buttons onto the fabric.
Check that the buttons are securely sewn down so the buttons don’t come off while regularly using your lumbar pillows or any other pillows.
Envelope Style
An envelope-style pillow cover is easy to make and doesn’t require a zipper or buttons:
Take a piece of the fabric 1.5 times as wide as your pillow at the same height.
Hem the fabric edges over itself
Insert the fabric in the back overlapping to make an envelope effect and remember your sewing job.
Tips for Choosing Fabrics For Throw Pillow Cover

- Durability: If the pillows are going to be a regular part of your house then you should pick fabrics that will not get ruined when you use them frequently. The choice of upholstery fabric is a good option for high-traffic areas. You can get guidence for it from our website.
- Cleaning: Think of machine-washable fabrics that require little effort with regard to maintenance. Check to see if the fabrics have a stain-resistant label on them. Also check the manufacturer care label from their website.
- Texture: Build a visually pleasing layout by mixing and matching textures. For some variation of interest, you might consider adding velvet, faux fur, or textured weaves.
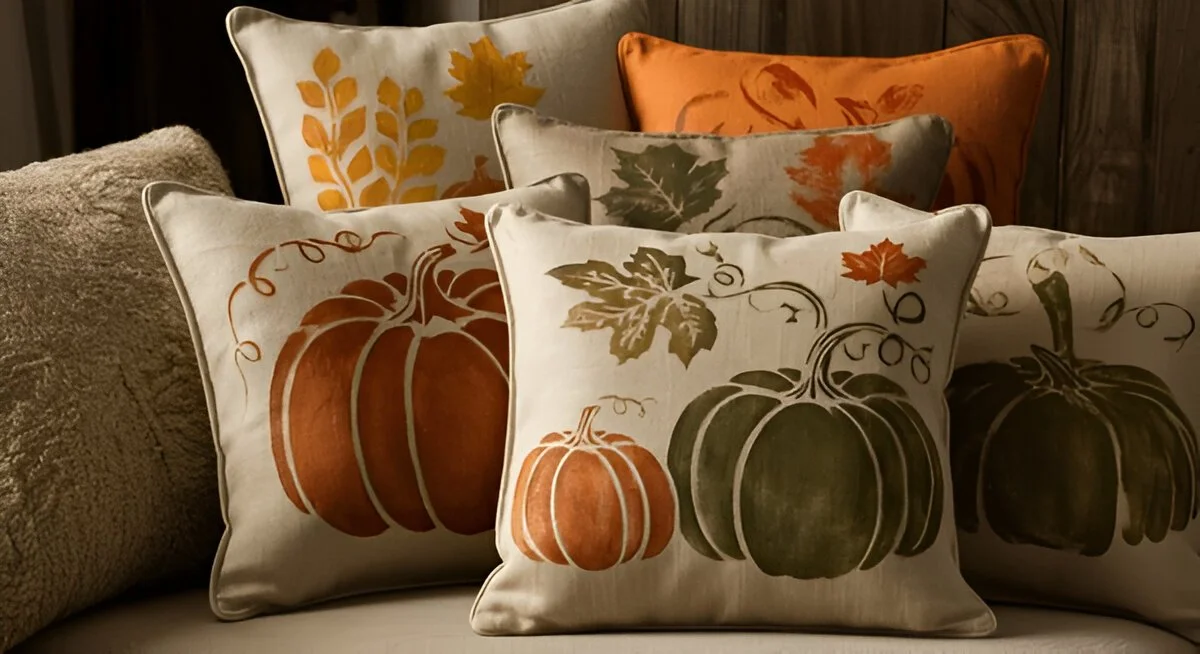
- Seasonal Fabrics: Go seasonally and switch out your pillow covers. In spring and summer use bright colors combined with floral patterns while in the fall and winter then go toward warm tones and heavier fabrics. You can get guidence about seasonal fabrics from our website.
Traditional Pillow Cover Vs Throw Pillow Cover
| Feature | Traditional Pillow Cover | Throw Pillow Cover |
|---|---|---|
| Customization | Limited to store-bought options | Endless possibilities, tailored to personal style |
| Cost | Can be expensive, especially for unique designs | Often more affordable, especially for simple designs |
| Skill Level | No sewing skills required | Basic sewing skills needed |
| Time Commitment | Quick and easy to purchase | Requires time for fabric selection, cutting, sewing, and finishing |
| Environmental Impact | May contribute to waste and overconsumption | Can be eco-friendly with sustainable materials and minimal waste |
| Satisfaction | Quick and convenient | Fulfilling and rewarding, especially for creative individuals |
Throw Pillow Cover FAQs

How do I choose the right fabric for my throw pillow cover?
- Take the room’s decor the pillow’s purpose and the fabric’s durability. Even if they are cotton or linen they are fine for everyday use. But velvet or silk can give something distinguished.
Can I Make a Throw Pillow Cover without a sewing machine?
- Yes! You can make your pillow cover with a sewing needle and string. It will take longer and need more effort. Effectiveness can be obtained with simple or zigzag stitch such as running or whip stitches or for outer edges.
Do I wash my throw pillow covers?
- Fabric covers are machine washable most of the time. Make sure to always check the care label on the manufacturer’s website for extra instructions. If you wanna keep the fabric then use gentle cycle and cold water.
What if I don’t want to use a zipper or buttons?
- You could add buttons, a zipper or any other affiliate links to a removable component. Then just modify the sewing steps adding the closure. Choose buttons that match your fabric choice to make the finished pillow look.
What can I do to make my pillow covers more eye-catching?
- Using piping, tassels or embroidery might also make your covers more personal. Fabric paint or stencils are also available for you to create unique designs on your old pillow cover or a new one. If you need more things then visit different website.
Can I mix different fabric patterns within one single garment?
- Absolutely! The act of mixing and matching fabrics creates a dynamic and interesting look. All you need to worry about is that the colors and patterns match. You can visit our website to get guidence about it.
How do I guarantee the perfect pillow cover?
- Measure your pillow insert perfectly and add 3 inches or 4 inches of seam allowances. If you’re not sure exactly how it’ll fit then make a test cover out of inexpensive fabric and check that it fits the right amount of give.
Conclusion
Learning to make a throw pillow cover is a simple and rewarding job to do and can bring its vibrance to make a 1 yard pillow or 2 squares pillow etc. Using only a few materials and some minimal sewing skills then you can make amazing personal pillows tailored to your personal sense of style. Whether it’s refreshing your living space and making a good atmosphere or giving a thoughtful gift this guide has all the information for you to start.

Adding your touch to the throw pillows involves switching up the fabrics, pattern mixes, and closures to create a collection of throw pillows that add personality and a little warmth to your home. Courtney gives you another creative project you can enjoy, a chance to make your own unique throw pillow covers, so gather your materials, unleash your creativity and start creating! Happy sewing!
- Who Invented a Pillow? Evolution and Significance of Pillows - February 24, 2025
- Rattan Sofa Halbrund Perfect For Luxury and Comfort - February 19, 2025
- Sweet Dreams Pillow A Luxurious Sleep Experienc - February 16, 2025